There wil be times when you wish to save a report as a PDF file, in order to retain it for future reference, or to email it to colleagues.
The MHR RemData system does not include an embedded option to create PDF files. Instead the system uses standard "PDF Printers" which are widely available, and use the browser print options to create and save a PDF file on a local or server/cloud folder. The process is little different from that used to print to any local printer: simply select the available "PDF Printer" in the "Print" dialogue rather than using a local or network printer.
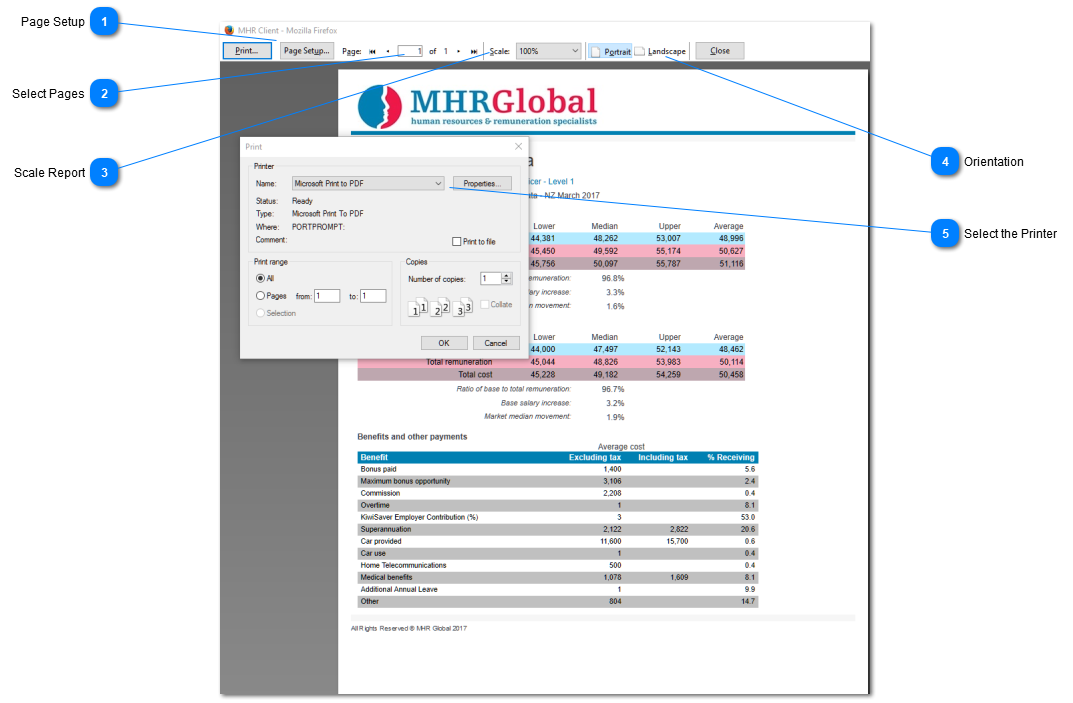
Users of Windows 10 will have access to a default "Microsoft Print to PDF" option listed in the available printers, as is the case in the example below. Use this to create and save reports as PDF files.
If you do not have Windows 10, and no "PDF Printer" or "PDF Writer" has been installed on your machine you will need to ask your IT support person to install one for you. There is a wide range of options - both paid and free - available online. Your IT support staff should be able to select and install one which meets your needs.
Page Setup
Use the "Page Setup" options to set margins and scaling